

Top
Author
Published
4 Mar 2023Form Number
LP1703PDF size
12 pages, 565 KBSubscribed to LP1703.
Thank you for your feedback.
Abstract
According to Linux statistics, there are over 600 active distributions and another 500 distributions in development. Some of the most commonly used are Ubuntu, Red Hat Enterprise Linux (RHEL), CentOS and OpenSUSE. As each Linux distribution has its own design, some functions may be different. For example, RHEL specific boot parameters cannot work on other distributions (Ubuntu, OpenSuSE and so on). Users are frustrated with those specific boot parameters if they have the limited Linux knowledge.
This paper mainly provides a brief introduction about how to set the parameters from Linux installation to boot stage on Linux distributions: RHEL, SUSE and Ubuntu. The paper is intended for IT administrators and quality assurance engineers. Readers are expected to have a basic knowledge of Linux.
Introduction
There are lots of components during the Linux boot/installation process and each component has its own parameters. The following figure shows the high-level stages of a typical Linux boot process.
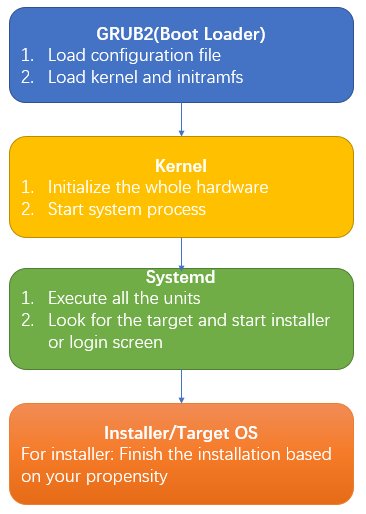
Figure 1. High-level stages of a typical Linux boot process
For the different Linux distributions, some parameters of above components are identical. However, different parameters among those distributions may have the same functionality. To avoid incorrect use of parameters, this chapter describes how to catch and set the relevant parameters about the different units.
The use of GRUB2
GRand Unified Bootloader version 2 (GRUB2) is a bootloader that allows user to quickly, easily and painlessly control the boot sequence of their systems. It is easy to get the usage with the following command.

Alternatively, you can view the user manual on the GNU web site:
http:// https://www.gnu.org/software/grub/manual/grub/
The parameters of the installer
In this section, we introduce the parameters used in the different Linux installers.
Anaconda
Anaconda is an installation program used by Red Hat Enterprise Linux, Fedora and some other distributions such as Asianux, Qubes OS, etc.
As different OS version contains different version of installer, download the relevant anaconda source package for the correct parameter. If you do not get the source package, refer to the close tag of https://github.com/rhinstaller/anaconda to find the parameter. Below is an example on RHEL 9.
- Download the source package from https://access.redhat.com/.
- Extract the file “boot-options.rst” from source package.
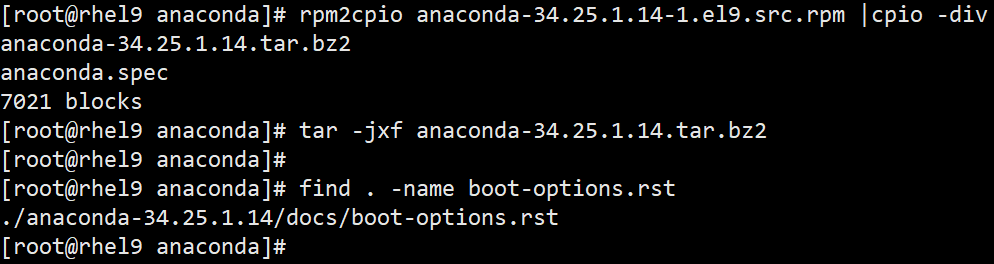
Figure 2. Extract the file “boot-options.rst” from source package - Check the file boot-options.rst to find out the required parameter and the corresponding definition. The parameter “ip” is an example different from SUSE installer.

Figure 3. ip parameter
Based on the guide of anaconda, the bootup is handled by dracut, so we can assume that the dracut options are also part of the anaconda parameters.
Those options can be shown with the command "man dracut.cmdline” or the following website:
https://mirrors.edge.kernel.org/pub/linux/utils/boot/dracut/dracut.html#dracutcmdline7

Figure 4. dracut man page
Linuxrc
Linuxrc is a small program that runs before the actual installation program YaST starts. The supporting parameter is included in the file linuxrc.html from the package “linuxrc”. You can also refer to web page en.opensuse.org/SDB:Linuxrc directly, however it is better to choose the version close to the old OS in the “History” item. The following figure is the example different from RHEL ip parameter.
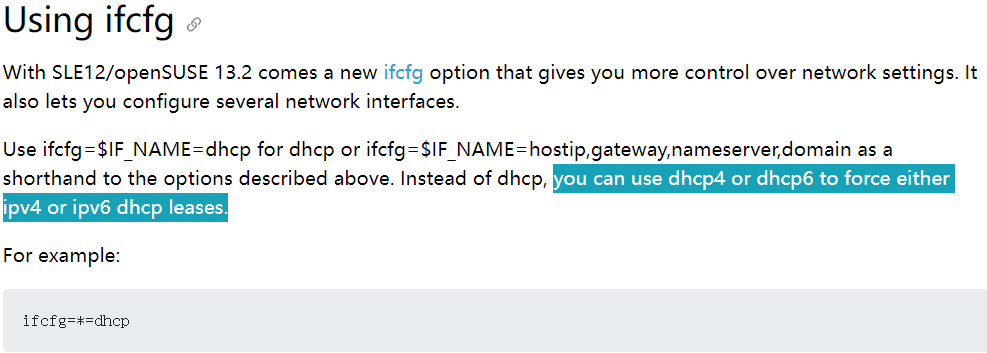
Figure 5. ifcfg parameter
Ubuntu installer
The default installer of Ubuntu 18.04 or earlier is Debian-installer(d-i). However, Ubuntu Server 20.04 or later introduces a new installer ‘subiquity server installer’ instead of the Debian-installer. As the d-i is about to be abandoned, this section mainly focuses on the 'subiquity'.
Subiquity contains three parts:
- Casper
- Curtin
- Cloud-init
The main boot options reside in Casper.
Refer to https://manpages.ubuntu.com/ for detailed information.
Kernel parameters
For kernel parameters, most of them are still consistent, such as nomodeset, iommu, acpi,etc. With the development of new features, new parameters have to be imported, such as no5lvl and hugetlb_free_vmemmap.
In order to check the supported boot parameter of your up-and-running OS, you can install kernel-doc package and get the available parameter list in the file kernel-parameters.txt (RHEL OS).
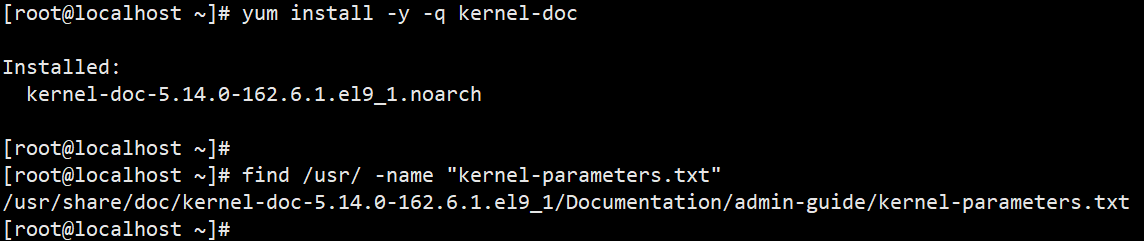
Figure 6. Installing kernel-doc
For SUSE OSes, please refer to https://github.com/openSUSE/kernel/blob/master/Documentation/admin-guide/kernel-parameters.txt, as the link is master branch by default, you need to switch to the relevant branch about OS version shown as follows.
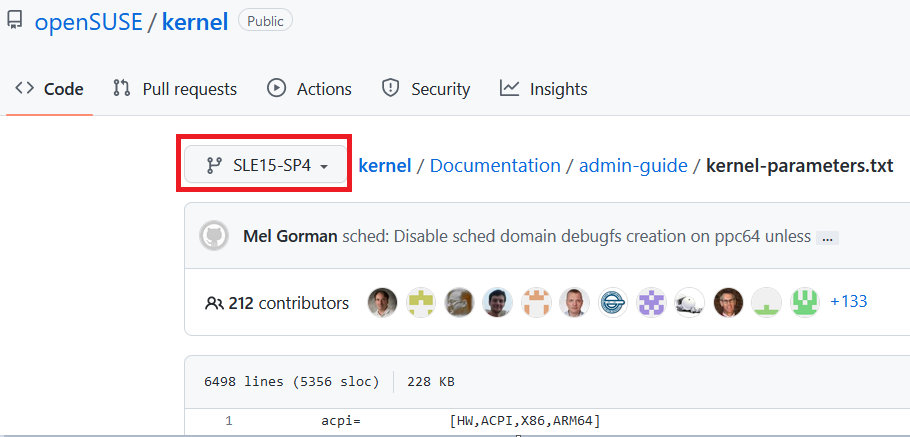
Figure 7. Kernel parameters information in openSUSE
For Ubuntu OSes, you can install linux-doc package and get the available parameter list in the file kernel-parameters.txt.gz.
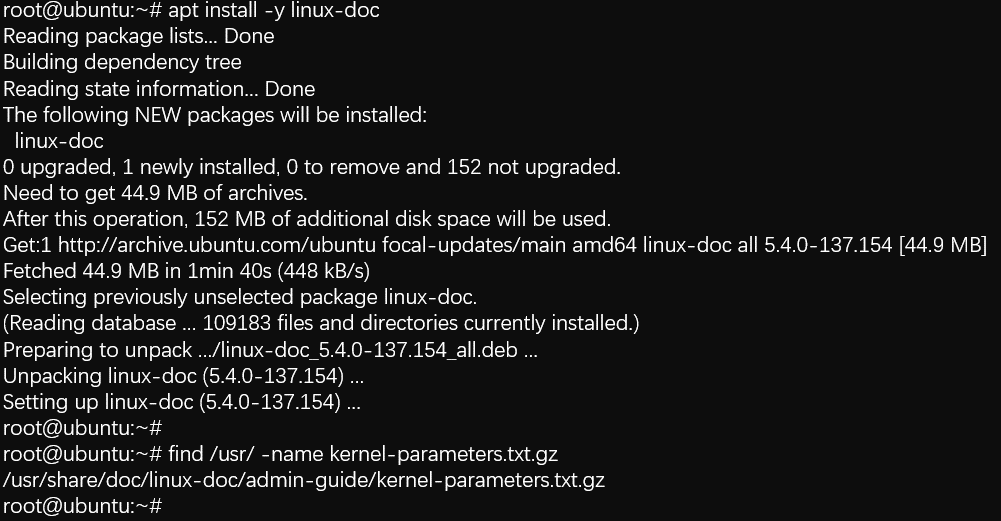
Figure 8. Kernel parameters information in Ubuntu
Systemd parameters
Systemd is Linux's system and service manager. It is the parent process that starts as PID 1 and acts as an init system which starts and maintains user space services. There are some boot parameters for controlling system behavior.
Since it is opensource software, we can check the boot parameters in the https://github.com/systemd/systemd/blob/main/man/kernel-command-line.xml instead of decompressing the source package.
Applying the boot parameters
This section describes how to apply the parameters during installation and boot.
For the installer, the kernel and system apply parameters in the same way, but the server can be set up as a BIOS-based or UEFI-based system, thus you will get a different boot menu interface. Below is setup method on BIOS-based systems.
RHEL
Press the Tab key and add custom boot options to the command line, press “Enter” to continue booting, as shown in the following image.
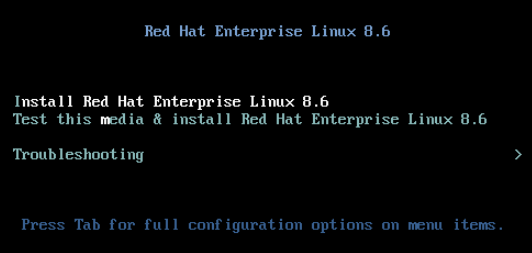
Figure 9. Prompt to press the tab key in RHEL
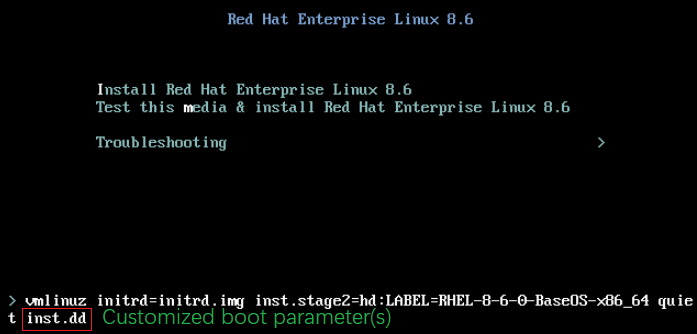
Figure 10. Entering custom boot options in RHEL
SUSE
Add custom boot options to the line “Boot Options” and press the Enter key to start the installation.
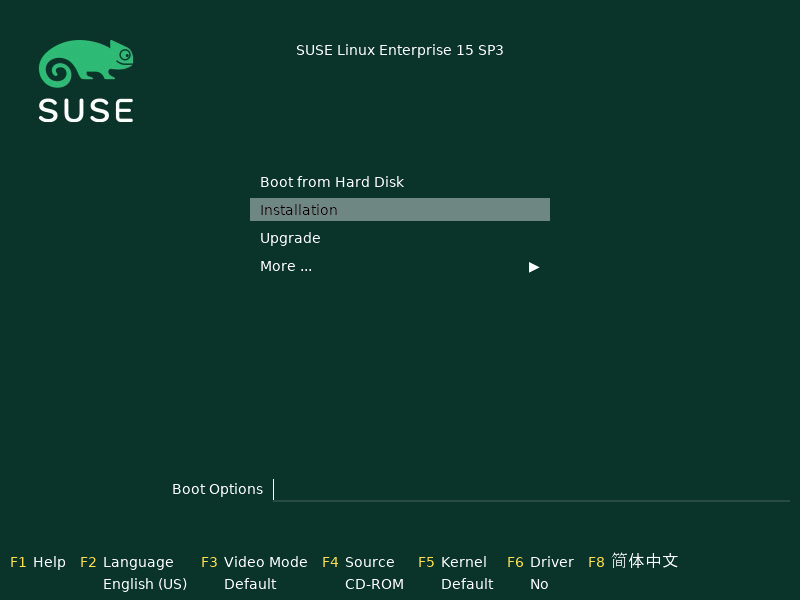
Figure 11. Custom boot options in SUSE
Ubuntu 18.04 & 20.04
For 22.04 refer to the next figure for UEFI-based systems below.
The line “Boot Options” is not displayed by default, it appears when the F6 key is pressed, adding custom boot options between “Boot Options” and text “---”.

Figure 12. Custom boot options in Ubuntu
UEFI-based systems
Below is setup method on UEFI-based systems. It works in the same way for RHEL/SUSE/Ubuntu server (18.04,20.04,22.04[Both UEFI and BIOS]) OSes, with SLES 15.3 used below as an example.

Figure 13. SLES boot menu
Use the arrow keys to highlight the Installation entry and press “e” to add parameters to the end of the line that starts with linuxefi or linux, as shown below. To boot the edited entry, press F10 or other combination key based on the help at the bottom.
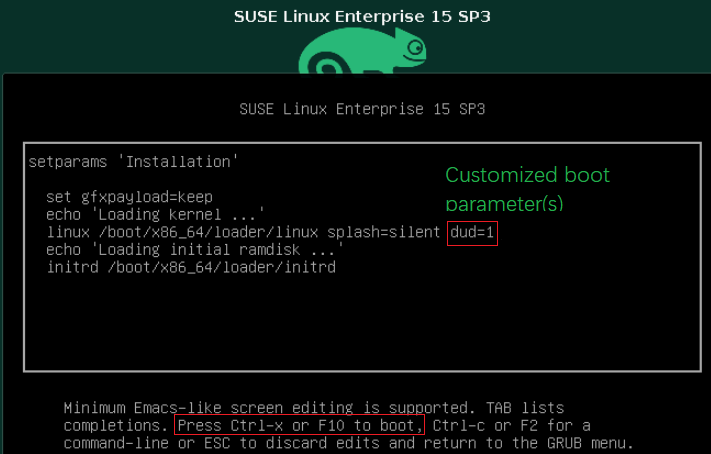
Figure 14. Adding parameters
Common parameters
This section introduces some common but ambiguous parameters and debug settings of GRUB2.
The following is the list of common parameters about different distributions.
Driver update parameters:
- RHEL:
inst.dd=hd:LABEL=DISK_LABEL:/DRIVER.rpm
inst.dd=http://IP/PATH/DRIVER.rpm - SLES:
dud=disk:/DRIVER.dud
dud=http://IP/PATH/DRIVER.dud insecure=1 - Ubuntu:
debian-installer/driver-update=
DHCP parameters:
- RHEL:
ip=dhcp|auto6 - SLES:
ifcfg=*=[dhcp|dhcp6] - Ubuntu:
ip=dhcp
Private parameters:
- RHEL:
inst.addrepo=REPO_NAME,[http,https,ftp,nfs]:// / - SLES:
1. self_update=[0|1]
2. addon=https://example.com/addon1,ftp://user:password@example.com/addon2 - Ubuntu:
toram
todisk=DEVICE
Public parameters (all distributions):
1. Debug boot issue: console=tty0 console=[ttyS0|ttyS1],[BAUD_RATE]n8 (where BAUD_RATE depends on UEFI setting)
2. Debug display issue: nomodeset
The following are the GRUB2 debug settings steps:
- Enable the serial debug in the files “/etc/grub.d/00_header”and “/etc/default/grub”.
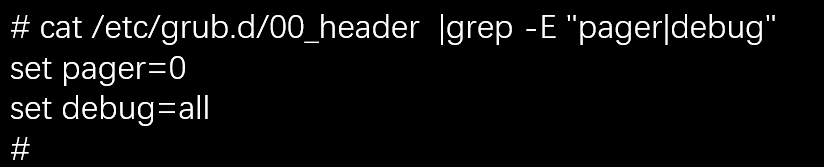
Figure 15. Enable the serial debug in 00_header
Figure 16. Enable the serial debug in grub - Rebuild the grub.cfg file using one of the following commands:
- RHEL 7 & RHEL 8 with UEFI:
# grub2-mkconfig -o /boot/efi/EFI/redhat/grub.cfg - RHEL 7 & RHEL 8 with Legacy BIOS
# grub2-mkconfig -o /boot/grub2/grub.cfg - RHEL 9:
# grub2-mkconfig -o /boot/grub2/grub.cfg - SLES:
# grub2-mkconfig -o /boot/grub2/grub.cfg - Ubuntu:
# update-grub
Author
Song Shang is a Linux Engineer in Lenovo Infrastructure Solutions Group, based in Beijing, China.
Related product families
Product families related to this document are the following:
Trademarks
Lenovo and the Lenovo logo are trademarks or registered trademarks of Lenovo in the United States, other countries, or both. A current list of Lenovo trademarks is available on the Web at https://www.lenovo.com/us/en/legal/copytrade/.
The following terms are trademarks of Lenovo in the United States, other countries, or both:
Lenovo®
The following terms are trademarks of other companies:
Linux® is the trademark of Linus Torvalds in the U.S. and other countries.
Other company, product, or service names may be trademarks or service marks of others.
Configure and Buy
Please select a locale


